Simple Site - Instructions
To make use of this system it is recommended that you
and then either:
- Copy/Fork the repository, edit the sample JSON files and begin to build your own project.
- Download/Clone a copy of the repository to your local machine, edit the JSON files as required and then just copy the required folders and files into you own existing repository.
For the full system to work, including the automatic rebuild process you will need to ensure your own repository includes:
- A copy of the build folder.
- A copy of the docs folder.
- A copy of the .github/workflows/build.yml file setup as a GitHub Action.
- A copy of any required licence files.
Additional things to check
Depending on how you copy the files you may also need to check the following issues.
GitHub Actions
The automatic process of building the pages is controlled by a GitHub Action. If you fork the original repository the GitHUb Action will be copied automatically, but it will need to be re-enabled, as it is disabled during the fork process:
- Click on the Actions option at the top of your repository page.
- A warning message will appear indicating that workflows have been disabled during the fork process.
- Click on the green “I understand...” button to re-enable the GitHub Actions
- Click on the Actions option at the top of your repository page.
- Click on the New workflow button.
- Click on the Set up a workflow yourself button.
- Edit the suggested page name if you want.
- Delete the default text in the edit window that will appear.
- Copy and paste the raw version of build.yml file into the editor.
- Click on the Start commit button to save the new workflow.
If you forked the repository this additional setup of setting up a new workflow will not be required.
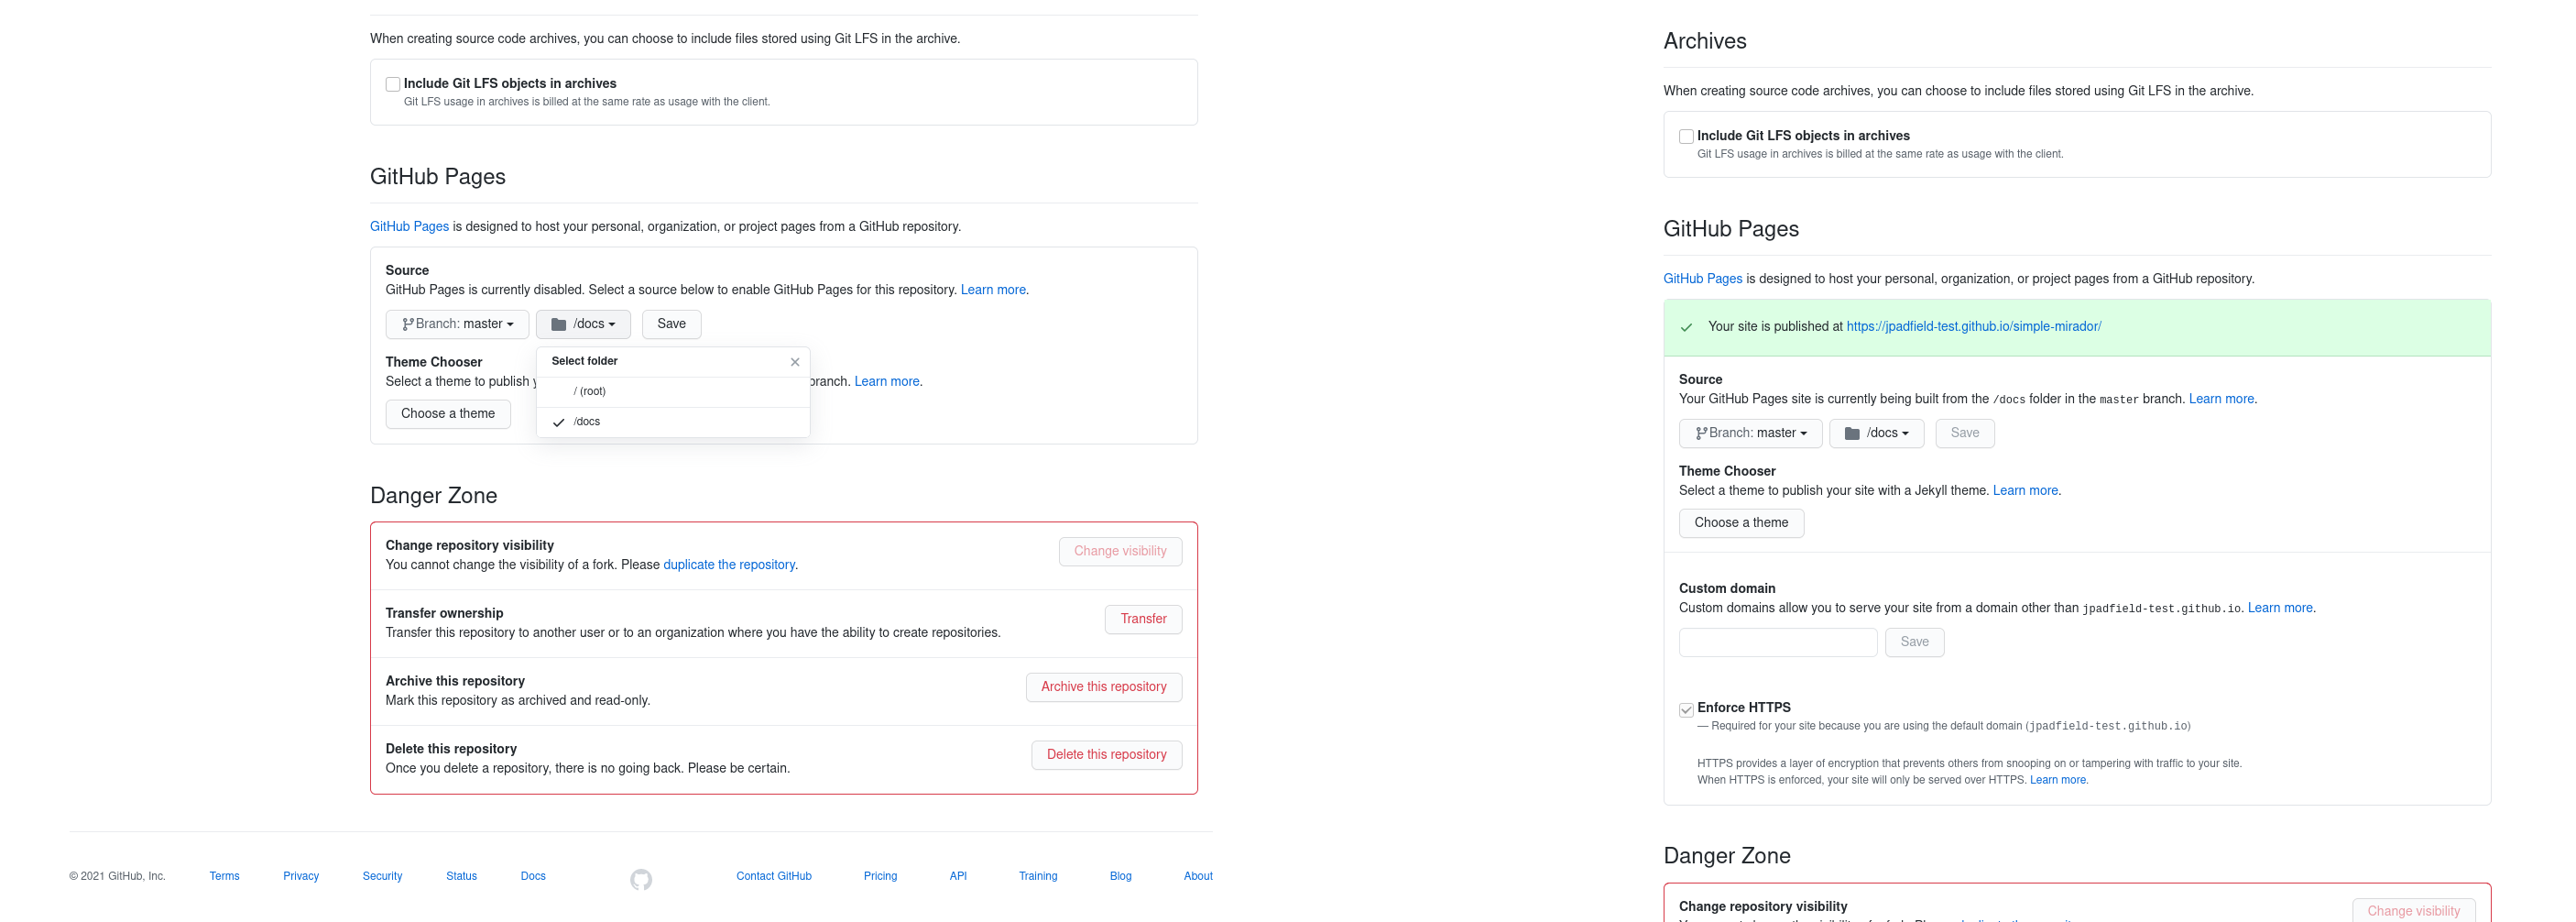
Enabling GitHub Pages
GitHub does not present project web-pages, GitHub Pages, by default, but it is very easy to turn this functionality on. The following steps can be followed when using this project, for more general instructions, or if you want to find more information you should be able to start here
- This process assumes you have copied the required project files, specifically the docs folder.
- Start from your project landing page - for the simple-site project the landing page is https://github.com/jpadfield/simple-site/.
- Click on the Settings tab, which should be towards the upper right corner of the page.
- Scroll down until you reach the GitHub Pages section.
- Select the master/main branch /docs folder option in the Source dropdown.
- In the new dropdown to the right of the selected option select “/doc” as the source folder
- Click on the “Save” button to continue.
- There will be a slight pause and the screen should be updated
- You can then scroll back down to the GitHub Pages section to see what your new web-page address will be.
- Your GitHub Pages should no be up and running.
Dependencies
Once built, simple-site should run without any additional software, all of the basic required javascript files and css style sheet files are already included, or externally referenced but more information about the main ones can be found at:
New sets of html pages are created automatically, within GitHub, when the JSON files are edited, controlled by a customised GitHub Action, called build.yml. However, if you want to be able to run the build process manually within a downloaded version of the repository you will also need to have PHP installed.
Issues and Comments
Any issues or comments can be added to the Issues section of this GitHub project: here.